

Create, manage & sign contracts
After reading this, you'll be able to create contracts, edit them, track versions, and invite recipients to sign electronically via eIDAS-compliant signature.
Contracts in Univents can be created directly inside an event, filled with free-form text, and then sent by email to customers or partners for electronic signature. The entire process — from draft to signed PDF — is handled centrally within the event.
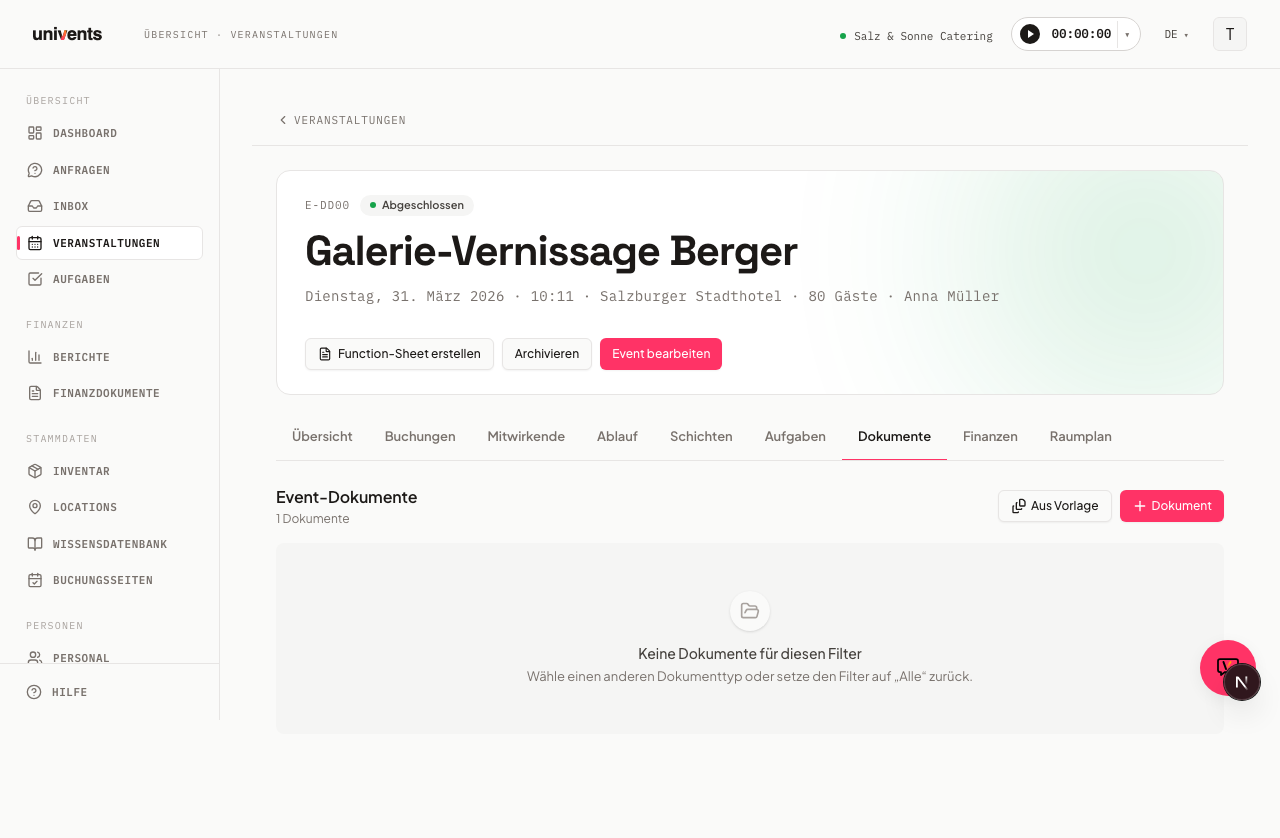
Creating a contract
Contracts are managed in the document list of an event. Open the relevant event and switch to the Documents tab. Click the Document button in the top-right corner and select Contract from the dropdown menu.
- The Create new contract dialog opens. Choose a saved template from the list, or leave the selection on Blank (no template) — the content can be entered manually at any time.
- Click Create contract. The editor opens immediately.
The contract starts with the status Draft.
Editing a contract and inserting placeholders
The editor works like a simple text document. Click into the content area and start typing. The title can be edited in the Contract title field at the top.
Placeholders are available for recurring fields:
- Click Insert placeholder in the toolbar.
- Select one of the available entries from the list.
- The placeholder is inserted at the current cursor position.
Six placeholders are available. Note that the tokens themselves keep their German names even in the English interface:
| Placeholder | Meaning |
|---|---|
{{Kundenname}} | Customer name |
{{Veranstaltungsdatum}} | Event date |
{{Veranstaltungsort}} | Event location |
{{Gesamtbetrag}} | Total order amount |
{{Leistungsbeschreibung}} | Description of the service rendered |
{{Gastanzahl}} | Number of guests |
Important: these placeholders are never substituted automatically anywhere — they only insert the literal text {{PlaceholderName}} at the cursor position. You need to type in the actual value yourself (e.g. the real customer name) before sending the contract.
Changes are saved automatically. To capture the current state manually at any point, click Save snapshot (located below the recipients section) to create an immutable version.
Adding recipients
Before a contract can be sent for signature, at least one signatory must be added.
- A search field appears in the Recipients section below the title.
- Type the name or email address of a contact or team member and select the matching entry.
- To add yourself as a signatory, click the Myself button.
- Each recipient is assigned a role. The default role is Signer — they receive a personal signature link. Recipients with the CC role receive an informational email without a signature link.
- Recipients can be removed using the X icon.
Sending a contract for signature
Once the contract has content and at least one signatory is listed, the Request signature button in the top-right corner becomes active.
- Click Request signature.
- The Send for signature dialog shows a summary of the recipients. Click Send.
- Each signatory receives a personalised email with a signature link valid for 30 days. From there, the contract can be read and signed electronically using OTP verification.
- The contract status changes to Sent. Once all signatories have signed, it changes to Signed.
When the status is Signed, a Download PDF button appears in the editor.
Versions and audit trail
Univents automatically saves snapshots at key points (before sending, after all signatures are complete). Additional snapshots can be created manually using Save snapshot.
The collapsible Versions (n) section in the editor shows the last five entries. Click View content to read the saved state of a snapshot. Click View all versions to open the full history.
The Audit trail directly below logs all security-relevant events: email sent, OTP code verified, signature added, status changes, and more. For fully signed contracts, the audit trail is expanded by default.
The signed contract PDF
Once everyone has signed, Univents appends two record pages to the contract: Digital signatures (signature image or typed name, signer, time, IP address, device used and the consent text) and Document history (the audit trail timeline including a checksum).
These two pages are the same ones you get on a signed quote or delivery note — one record that looks and reads the same everywhere. Names with umlauts and special characters are printed correctly, and the device line is spelled out in plain words ("Safari on iPhone, iOS 18.1") instead of a technical identifier.
If you uploaded a finished PDF instead of writing the contract in the editor, the signed PDF now contains your uploaded original followed by those two record pages.
Verifying a contract without a login
The signature page carries a checksum together with the note "Verify at univents.app/verify/…". Anyone opening that address sees, with no account and no login, which document it is, who issued it, when it was signed and who signed it — nothing more. If the checksum matches no document, the page says exactly that. Besides contracts, the verification page also knows signed documents and order confirmations.
Managing templates
Frequently used contract texts can be saved as templates and reused when creating any new contract.
Creating a template from an existing contract:
- Open the document list of the event and click the context menu on the contract card.
- Select Save as template.
- Enter a name (e.g. "Standard Catering Contract") and click Save.
Recipients, signatures, and filled placeholder values are not carried over — only the raw content.
Managing templates: Under Settings > Contract templates you will find all saved templates. Click the name directly to rename it inline. Use the trash icon to delete a template — existing contracts created from it are not affected.
Frequently asked questions
Can I still edit a contract that has already been sent? No. Once a contract has been sent, the content is locked. If a change is needed, the signatory can request a revision from the signature portal — the status then changes to Revision requested, and the editor becomes editable again.
What happens to an archived contract? Archived contracts are read-only. Content, recipients, and the send function are all disabled. A contract can be restored at any time via the context menu in the document list.
Are the signatures legally valid? Yes. The signature process uses OTP verification by email and records the IP address, user agent, and timestamp — this meets the requirements for a simple electronic signature under eIDAS (Art. 3 No. 10).
What does "Consent text fixed" mean in the audit trail? Before each signature, the consent text that was valid at the time of signing is saved as an immutable snapshot. This ensures it is always possible to prove exactly which text the signatory saw.